Embedded Analytics with Veezoo
Veezoo's Embedded Analytics offers an integration solution that enhances your applications with our sophisticated, natural language querying (NLQ) data analytics and visualization capabilities.
About
Value Proposition
You can integrate Veezoo’s conversational, Self-Service Analytics interface directly into your software or portal. With Embedded Veezoo, you give your users the flexibility to explore the data they want without making your software more complicated nor wasting development resources.
Our robust security, permission, and multi-tenancy architecture ensures that your users or customers only have access to what they’re allowed to see.
Characteristics
- Seamless integration into your application for an improved user experience.
- Supports multi-tenant architectures, providing personalized data experiences.
- Utilizes JWT (JSON Web Tokens) for secure user authentication.
1. Contact Us to Enable Embedded Analytics
The first step is to contact us if you are interested in the embedded functionality of Veezoo. This feature is not part of the Free tier and comes with a tailored pricing on request.
2. Configure Allowed Hosts
On the Embedding Configuration page, make sure the Toggle Switch is ON (Embedding is enabled).
For secure embedding, you need to specify the allowed hosts in Veezoo's admin settings. This ensures that your Veezoo content is only accessible from your designated, trusted domains.
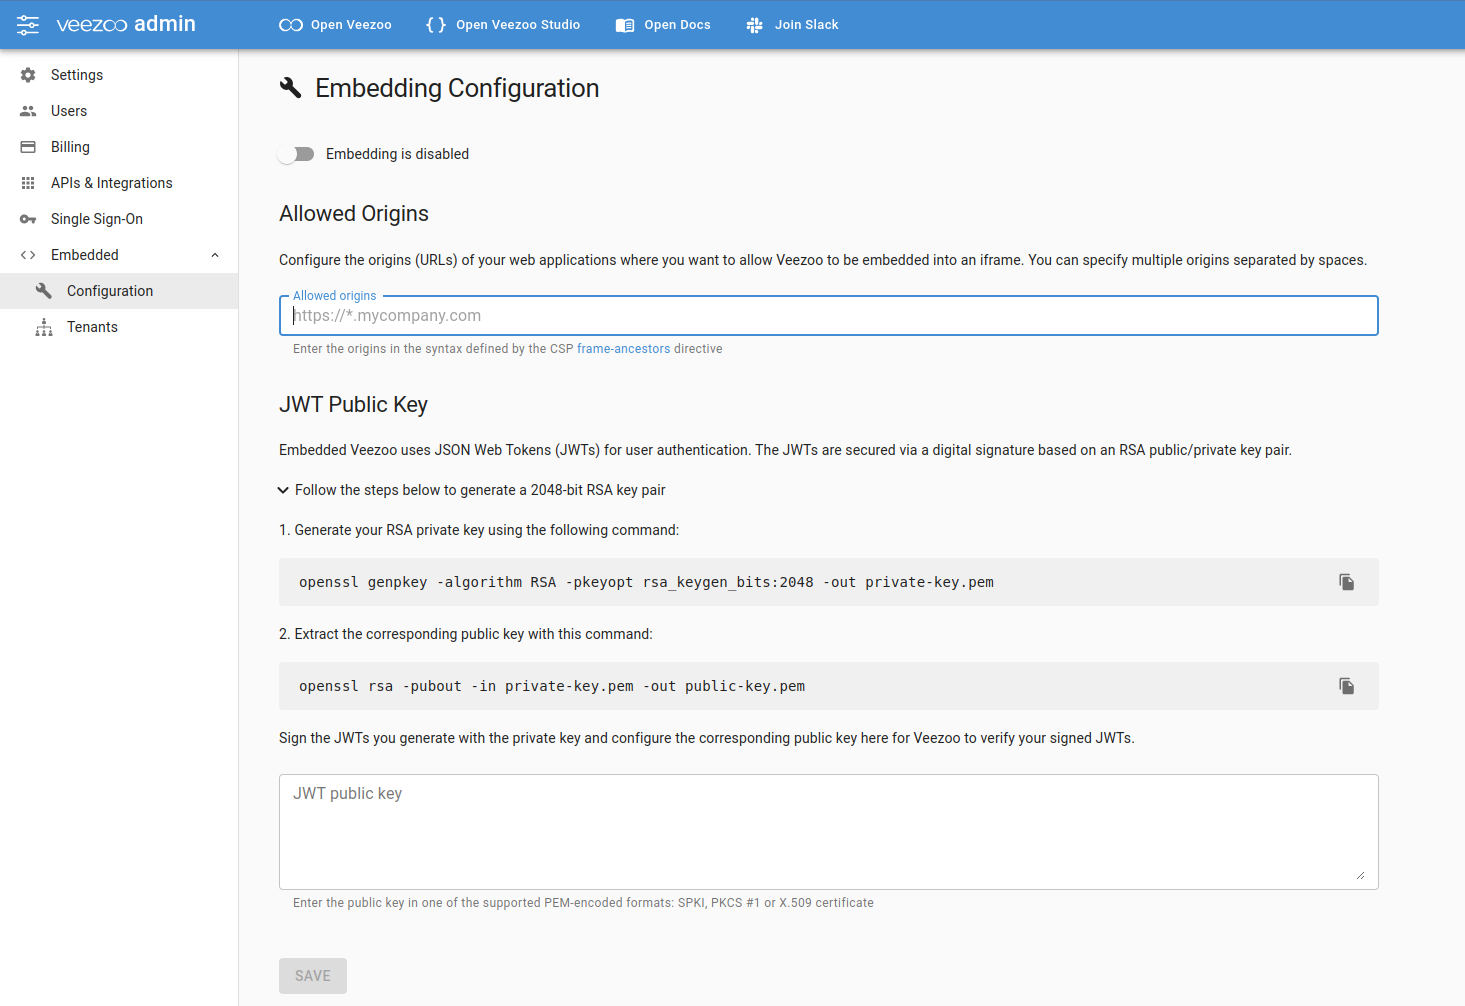
3. Configure a Public Key to setup JWT (JSON Web Tokens)
Veezoo supports JWT for user authentication within Embedded Analytics. To enable secure access to relevant data and analytics, your application will have to generate a JWT on your server and pass it to Veezoo. For that to work, you will need to configure in Veezoo Admin the public key for a private key that will be used by your application to sign the token.
If you don't know how to create a key pair, follow the instructions provided in Veezoo Admin.
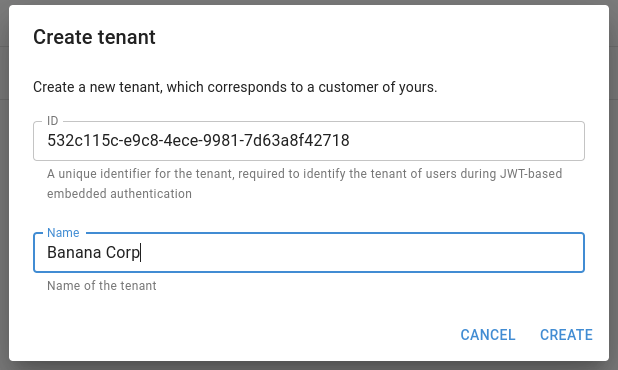
4. Configure Tenants in Veezoo
Veezoo's Embedded Analytics supports multi-tenant architectures. A tenant corresponds usually to a customer of yours, which may have multiple users in your application. Veezoo needs to know about the existence of these tenants, so that when a user accesses Veezoo through your application it will access the Knowledge Graph with the right authorization logic.
To configure Tenants in Veezoo, go to Veezoo Admin > Embedded > Tenants.
Currently these need to be manually added over the UI, but we plan to release a Veezoo Admin API to do this programatically.
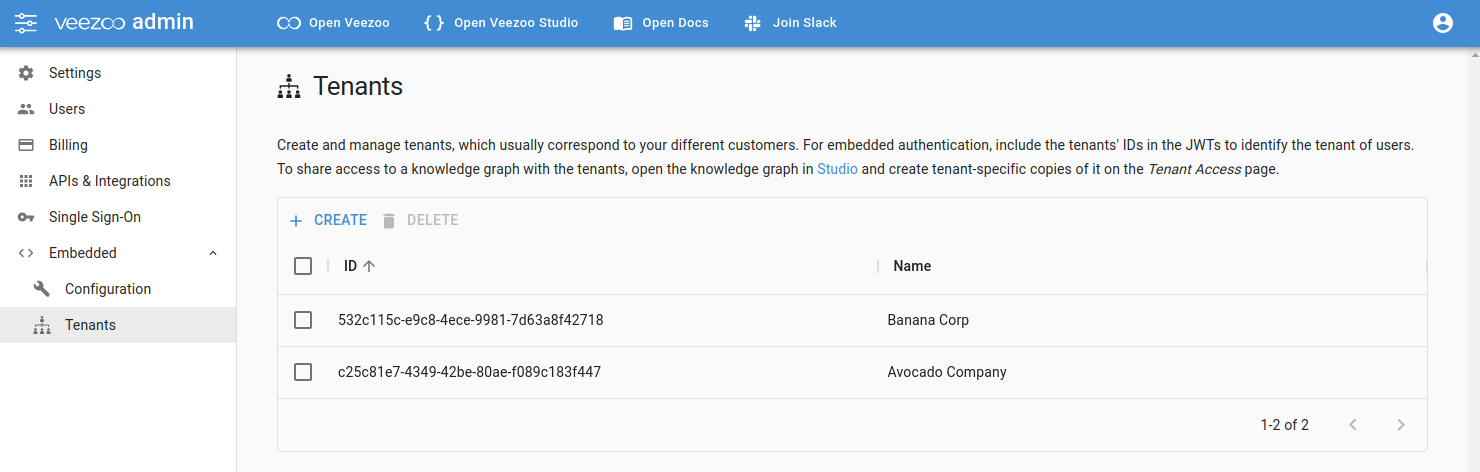
You will have to give it a name and a Tenant ID, which is the ID your application uses to identify a tenant. This will be important for mapping a user to the right tenant as part of the JWT authentication.
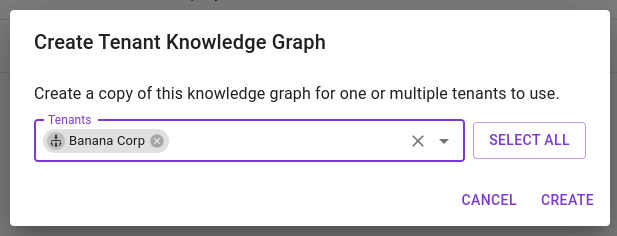
5. Provide Access to a Knowledge Graph for a Tenant
Choose the Knowledge Graph that will be available for your tenants and configure Tenant Access in Studio.
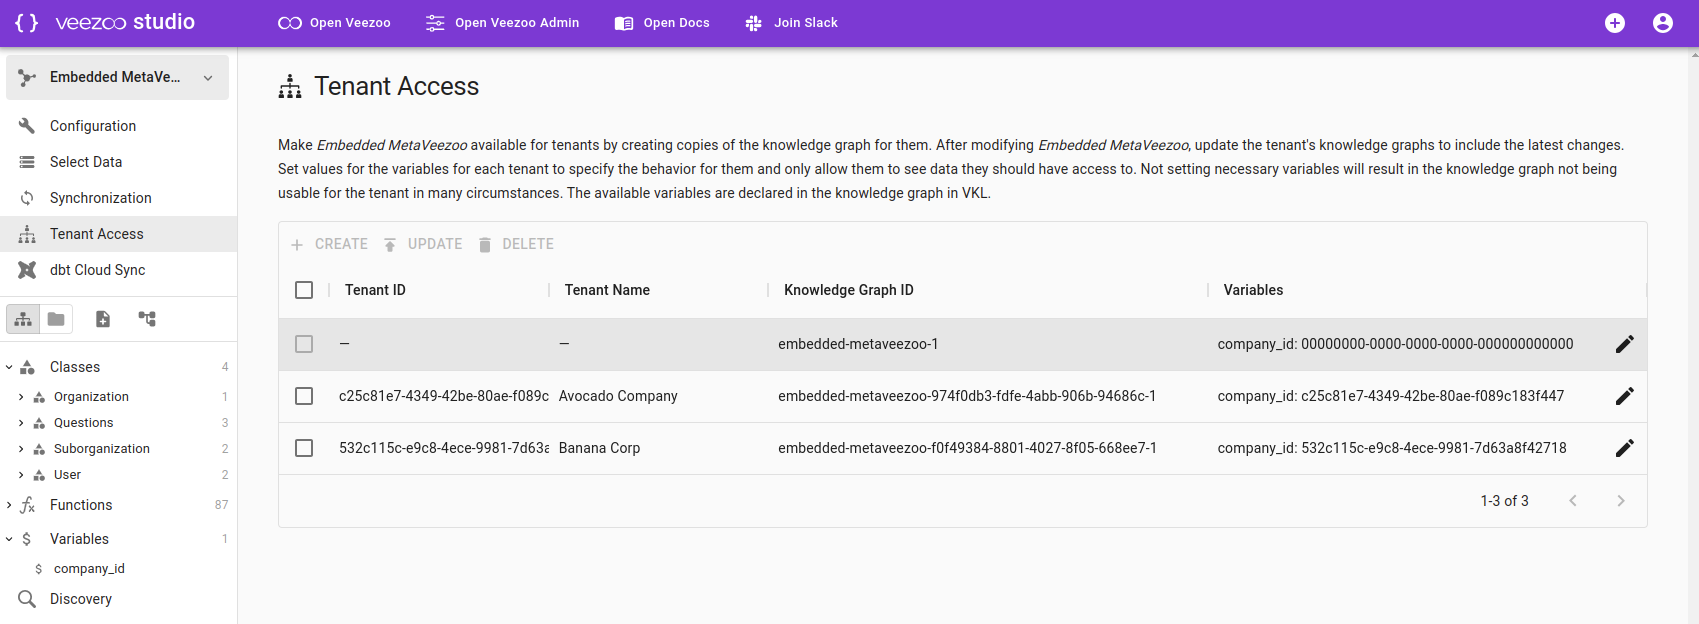
Veezoo will generate a different view of the same Knowledge Graph for each tenant. You will still manage only the main Knowledge Graph, but in the next steps you will configure how the authorization logic works for each tenant. This way, users will see different data in their answers and dashboards and different entities in the AutoComplete.
Currently these need to be manually added over the UI, but we plan to release a Veezoo Admin API to do this programatically.
6. Publish Changes to Tenants
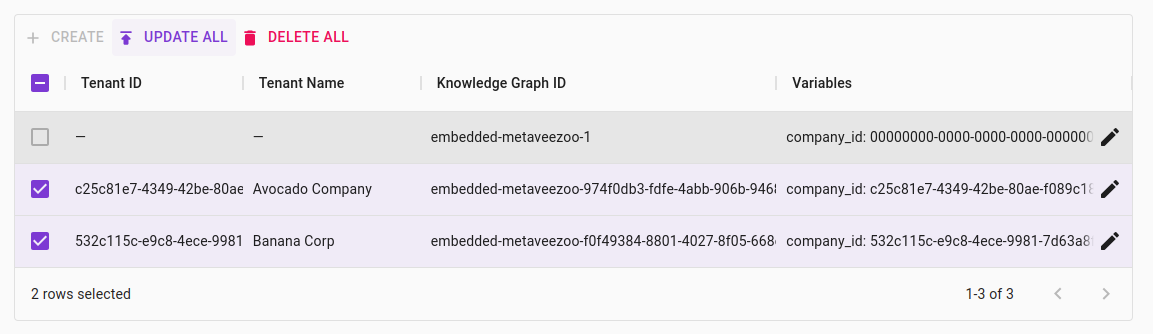
While you develop your Knowledge Graph further, you will want to eventually publish the changes to your tenants.
To do that, you will have to 'update' them over the UI in Studio > Tenant Access. Select which ones to update (or all) and click on Update.
7. Define Authorization Logic for Tenants
Veezoo supports granular control over data access through variables and row-level permissions. This allows you to define which rows of data within a KG are accessible by a specific tenant.
What are Variables?
You can think of variables as placeholders defined in the Knowledge Graph and which can have a different value assigned per tenant. These variables can be used in SQL queries or for the database connection, so you can tell Veezoo how to restrict the data for each tenant.
By default, you can already access the content of the variable veezoo.Tenant.Id with the ID you've configured for your tenant in the step 4 above. This is the most common way to do row-level authorization for your tenants. But if you need to create other variables, follow the next steps.
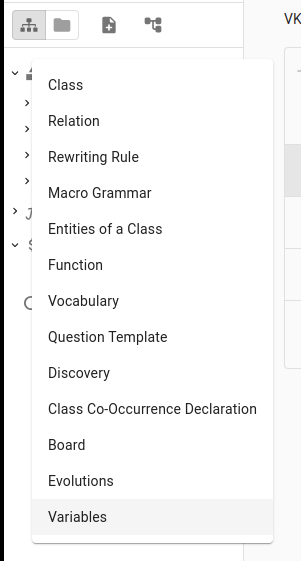
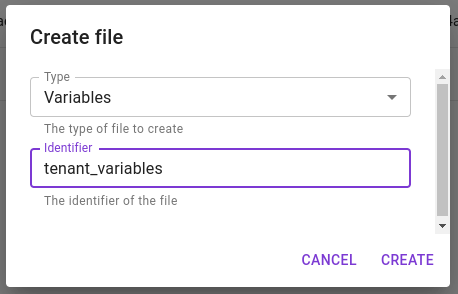
To create variables for your Knowledge Graph, you will have to create a new file of type 'Variable' in Studio.
Example content:
variable company_id {
  # Leave blank
}

# You can also have multiple in the same file
variable date_cutoff {
  # Leave blank
}
If you declare a new variable, you will have to first publish these changes to your tenant views of the Knowledge Graph, before you are able to assign values. Follow the same steps as in the section 'Publish Changes to Tenants' above.
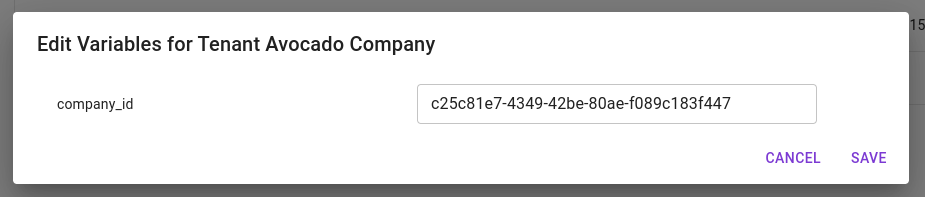
Now you can assign a value to these variables for each tenant, incl. for the main Knowledge Graph, by going on the Tenant Access page and clicking on the pencil at the Variables column.
Now let's see how we can use these variables to restrict data access.
Authorization over virtual_table
With virtual_table you can define SQL with special templating to specify row-level authorization needed for your tenants. Read the related articles linked to understand more about how to work with it.
Here is how an example on how to use virtual_table in combination with variables (e.g. veezoo.Tenant.Id here) to restrict access to the data:
db.storage.hiring_app {

    virtual_table candidates {

        identifier: "candidates"

        # Only show candidates from the current tenant (veezoo.Tenant.Id)
        virtual_table_sql:
         """
            SELECT
              *
            FROM
              candidates c
            WHERE
              c.company_id = ${quote(veezoo.Tenant.Id)}
            """


        column ID {
            identifier: "ID"
            is_primary_key: true
            primitive_type: "varchar"
        }

        ...
   }
}
In this case, we used the default veezoo.Tenant.Id, which comes pre-defined. But you could have used any other variable that you've defined in the Knowledge Graph as well.
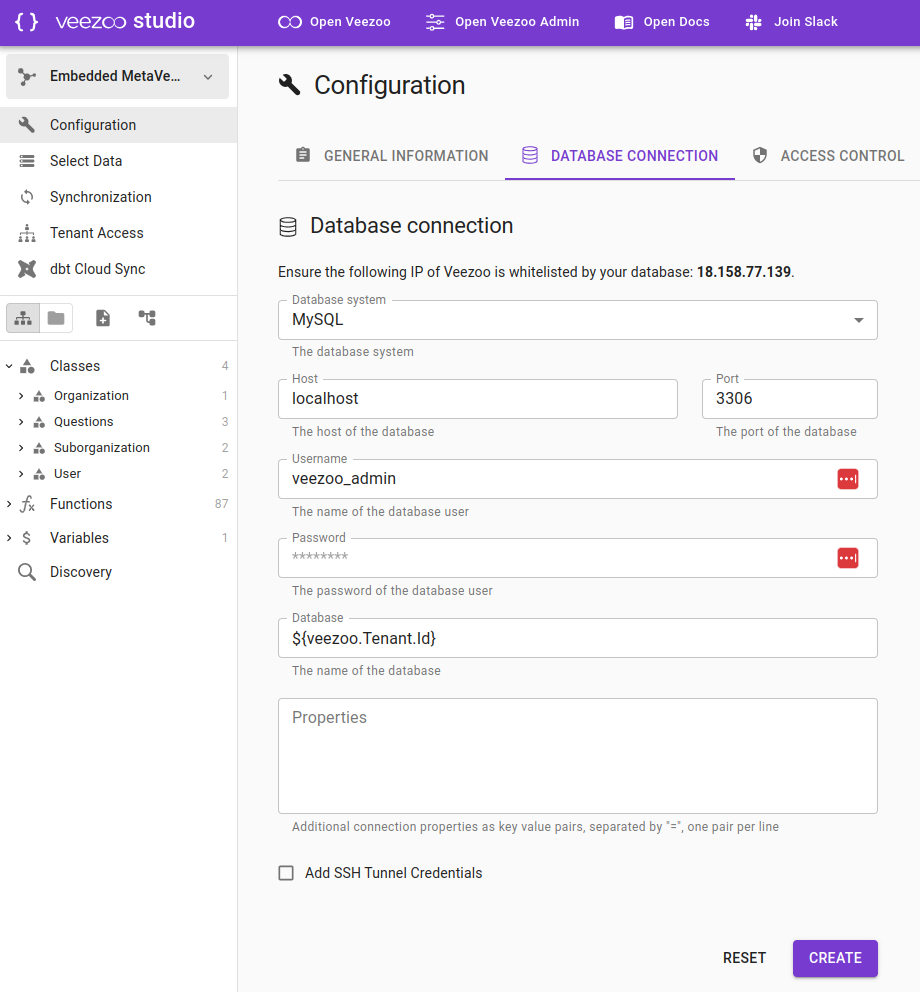
Authorization over Database Connection
Alternatively, you may have a different way of handling your customer's data. One common approach is to have separate schemas for each client.
Veezoo allows you to configure this by using variables in the Configuration > Database Connection.
Here is an example using MySQL:
8. Configure Shared and Non-Shared Entities
Once you've configured the authorization logic for the tenants, you will want to check which Entities should be shared / common to all tenants and which ones are tenant-specific.
As an example, let's say you have an HR application with information about the hiring process, where there is a status for it. It could be that Status is a class with entities that are common to all tenants. In this case, you don't have to do anything specifically for it.
But let's say you have another class called Candidate. In this case, each tenant will want to see its own candidates. For that, apart from configuring the authorization logic described in the previous section, you will have to delete the entities of the class Candidate and select it as a class to be synced (cf. Knowledge Graph Synchronization).
Don't forget to "Update" the tenant Knowledge Graphs as described in step 6.
9. Embed Veezoo into Your Application
You can integrate Veezoo into your software by incorporating an iframe that points to Veezoo's domain and uses the generated JWT for user authentication.
JSON Web Token (JWT)
To embed Veezoo into your application, you will first need to generate a JSON web token (JWT). This token will then be included in the URL used to load the Veezoo interface into an iframe.
The JWT makes use of the following claims:
| Key | Name | Required | Description |
|---|---|---|---|
iat | Issued at | required | Identifies the time at which the JWT was issued |
exp | Expiration time | required | Identifies the expiration time on and after which the JWT must not be accepted for processing |
jti | JWT ID | required | A unique identifier for the JWT to avoid replay attacks |
tenantId | Tenant ID | required | The ID of the tenant in Veezoo the user belongs to |
sub | Subject | required | Identifies the subject of the JWT, i.e. the user to be authenticated |
email | required | The email address of the user | |
firstName | First Name | required | The first name of the user |
lastName | Last Name | required | The last name of the user |
language | Language | optional | The default language of the user, specified as a BCP 47 language tag (currently supported are en-US, de-DE, fr-FR, it-IT and pt-BR). |
The JWT needs to be signed with the RSA private key from the public/private key pair of which you have configured the public key in Veezoo Admin.
iFrame
To embed Veezoo in your application, you will need to include an iframe in your application's HTML code. The iframe must point to Veezoo using your subdomain and include the JWT in the URL:
<iframe src="https://<subdomain>.app.veezoo.com?jwt=<jwt>&embedded=true"></iframe>
Sample code
Here's a simplified example of how to accomplish this using Python and Flask (you will need the libraries cryptography and pyjwt, both of which you can get via pip):
from flask import Flask, render_template
import jwt
from datetime import datetime, timedelta
import uuid

app = Flask(__name__)

def generate_jwt(payload, private_key, expiration_minutes=5):
    headers = {
        "typ": "JWT",
        "alg": "RS256"
    }

    # Update the payload with "iat" and "exp" claims
    iat = datetime.utcnow()
    exp = iat + timedelta(minutes=expiration_minutes)
    payload.update({
        "iat": iat,
        "exp": exp,
    })

    # Generate JWT
    encoded_jwt = jwt.encode(payload, private_key, algorithm="RS256", headers=headers)
    return encoded_jwt

@app.route("/")
def home():
    jti = uuid.uuid1()
    payload = {
        "tenantId": "64bc23cc-cc6e-4387-9f7d-fc125b132895",
        "jti": jti,
        "sub": "a529a344-7b43-46e1-bd56-2a722abd683b",
        "email": "john.doe@company.com",
        "firstName": "John",
        "lastName": "Doe",
        "language": "en-US",
    }

    # Note: private_key should be a string in PEM format. It typically starts with
    # '-----BEGIN PRIVATE KEY-----' and ends with '-----END PRIVATE KEY-----'.
    private_key = "<your-private-key-here>"
    jwt = generate_jwt(payload, private_key)

    # substitute 'company' by your Veezoo subdomain
    veezoo_url = f"https://company.app.veezoo.com?jwt={jwt}&embedded=true"

    return render_template("index.html", veezoo_url=veezoo_url)
In this example, your index.html file, placed in the templates directory, would look something like this:
<html>
  <body style="background-color: #f8f8f8; margin: 0; display: flex; align-items: center; justify-content: center; padding: 50px;">
    <iframe
      id="veezoo-iframe"
      src="{{ veezoo_url }}"
      frameborder="0"
      style="width: 100%; height: 100%; border: 1px solid #ddd;"
    >
    </iframe>
  </body>
</html>
Testing Your Embedded Integration
When testing your embedded Veezoo integration, there are several important considerations to ensure a smooth testing experience:
Browser Compatibility and Third-Party Cookies
Embedded Veezoo requires third-party cookies to be enabled in your browser. This means that the following will break the embedding:
- Incognito/Private mode: Most browsers block third-party cookies by default in incognito or private browsing mode, which will prevent embedded Veezoo from working properly.
- Safari: By default, Safari has strict third-party cookie policies that may interfere with embedded functionality.
Authentication Conflicts
If you're logged into Veezoo in the same browser session where you're testing JWT authentication, this can cause authentication conflicts and unexpected behavior.
Recommended Testing Setup
To avoid these issues, we recommend using separate browser profiles for testing.
Chrome Example:
- Create a new Chrome profile specifically for testing embedded Veezoo
- In this profile, ensure third-party cookies are enabled
- Do not log into Veezoo directly in this profile - only test the embedding
- Use your regular browser profile for normal access to Veezoo
10. Message Passing between iFrame and Your Application
Veezoo's Embedded Analytics also supports message passing between the iFrame embedding Veezoo and your application, leveraging JavaScript's Window.postMessage() method for cross-document messaging.
Receiving Messages from Veezoo
The following code shows how you can listen to messages from Veezoo:
window.addEventListener('message', event => {
  // check the event's origin in order only to process messages sent by Veezoo
  if (event.origin === 'https://<subdomain>.app.veezoo.com') {
    const message = event.data;
    if (message.type === '<type>') {
      // process message of type <type>
    }
  }
});
Veezoo currently sends the following messages:
| Type | Description | Example |
|---|---|---|
boards | Provides information about the dashboards which are available to the user. Contains the following data:
| |
Sending Messages to Veezoo
The following code shows how you can send messages to Veezoo:
// replace <id> with the ID of your Veezoo iframe
const veezooIframe = document.getElementById('<id>');
const message = {
  type: "<type>",
  // provide additional data
  ...
};
veezooIframe.contentWindow.postMessage(message, '*');
Veezoo currently accepts the following messages:
| Type | Description | Example |
|---|---|---|
openBoard | Opens a board in the chat. Provide the following data:
| |
setLanguage | Sets the language of the knowledge graph. Provide the following data:
| |
Conclusion
With Veezoo's Embedded Analytics, you can enhance the value of your application by providing an integrated, dynamic, and interactive data analytics experience, powered by our sophisticated NLQ capabilities. This ensures your users have immediate access to insights and data-driven decision-making tools right within your application, improving user engagement and overall satisfaction.
If you encounter any issues or have questions about embedding Veezoo into your application, don't hesitate to contact us for support.